Gluten-free mailbox brownies
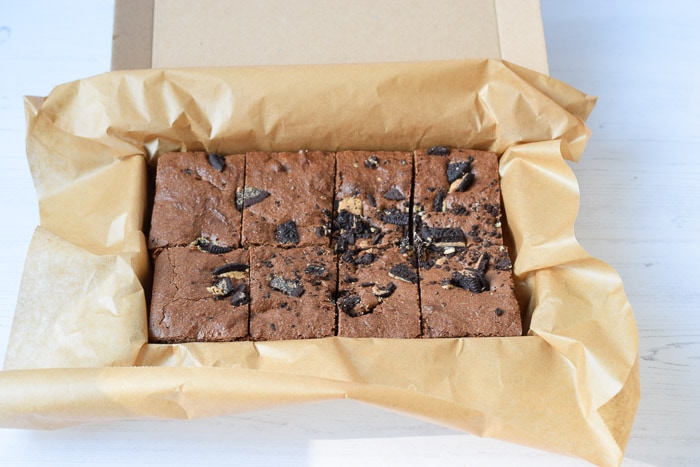
Now that we are all at home and cannot see our friends and family easily, I thought it would be nice to send my friends and family a little surprise from home. And as a foodie, my first thought was of course: food. What can I make that can stay out of the fridge and that I can sent through the mail? Something that is flat, but very tasty? Brownies! Last week, I went into my kitchen and whipped up about 10 servings of gluten-free mailbox brownies.
I brought part of it around by car, to the people that live close to me and part of it went in the mail. I was a little afraid to send the brownies, but it went well. Everybody received the brownies in a perfect state on their doormat.
This sunday it is mothersday in the Netherlands and also then these brownies are a perfect way to surprise your mother! Especially because you probably cannot visit right now.
Gluten-free brownies
I share a recipe for gluten-free brownies because this is a low FODMAP blog, but if the person that you send the brownies to doesn’t have to eat gluten-free, you can also make them with normal self-raising flour. I tested the brownies with both gluten-free and normal self-raising flour and both turned out very tasty.
The recipe that I share below is my standard recipe for brownies. With this recipe, I could fill 1.5 boxes of brownies. I made the recipe twice every time, so I could make 3 boxes of brownies at once. In total, I made the recipe 6 times to fill 9 boxes of brownies, plus some leftovers for ourselves 😉
Brownie variations
You can make plain brownies, but you can also add different ingredients to make the brownies even more tasty. My favourite options are:
- Oreo brownies: you need one package of gluten-free and low FODMAP Oreo’s / double cookies. Break them into pieces. Stir half into the batter and divide the other half on top of the batter after you have put the batter into the baking tin.
- Salted caramel brownies: replace half of the dark chocolate by Tony’s Chocolonely caramel sea salt chocolate or another chocolate bar with salted caramel (make sure no high FODMAP ingredients have been added)
- Raspberry white chocolate brownies: stir 50 g (1/4 cup) white chocolate chips and 100 g (3/4 cup) fresh raspberries into the batter at the end.
- Peanut butter brownies: divide 4 tablespoons of peanut butter on top of the batter at the end. Swirl it through the batter with a toothpick.

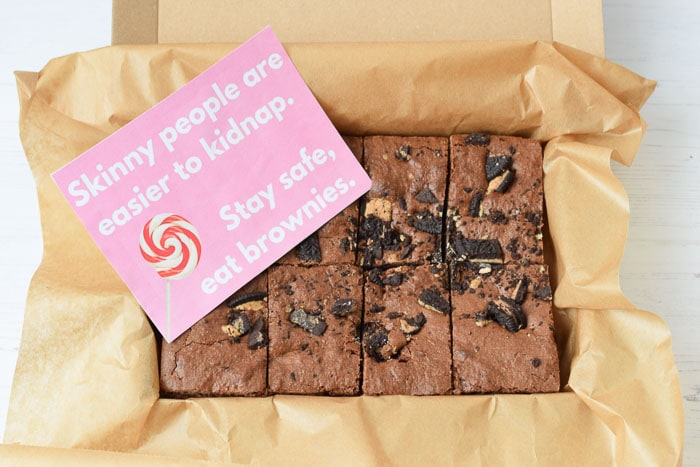
Add a nice card and your brownies are ready to go!
How to make sure that your brownies arrive safely
If you are going to send brownies in the mail, you want to make sure that they arrive in time and safely. This is how you do that:
- Make sure to use a strong package. I bought cardboard mailbox boxes in A5 format and made sure that I cut the brownies so that they exactly fitted into the box. Like this, the brownies won’t move around in the box and the chance is smaller that they will break.
- Wrap the brownies well. I wrapped my brownies in a piece of baking parchment, that I closed on all sides properly. You can also wrap them into plastic.
- Make the brownies on the day that you are going to send them and put them into the mailbox right before it is emptied. Make sure you send them on a working day with at least 1 or 2 workings days following. And only sent them to a place where you can be sure that they will be delivered within 1-2 days. For example: here in the Netherlands, the mail is not operating on Sundays and holidays. I sent my brownies on a tuesday and on wednesday they arrived. They were on the way for less than 24 hours, that was perfect.
- I made the labels for my packages with the Dutch mail app, like this the persons that I was sending the brownies to received an email that a package was coming their mail and they would also be notified when the package arrived. Like this, the brownies wouldn’t be left in the mailbox for days. If you don’t have this option, you can also just text the person you are sending the brownies to to keep an eye on the mailbox because a surprise is arriving 😉
Will you let me know if you have made my gluten-free mailbox brownies? I would love it if you would let me know what you think about the recipe by leaving a comment and a rating below. You can also share your creations with me by tagging me on Instagram @karlijnskitchen or by using the hashtag #karlijnskitchen.
Print
Gluten-free mailbox brownies
- Total Time: 35 min
- Servings: 1.5 A5 box 1x
- Diet: Gluten Free
Description
Feel like surprising someone with delicious brownies delivered to their house? Then make these gluten-free mailbox brownies. Brownies that will fit through the mailbox.
Ingredients
- 200 g (7 oz) dark chocolate
- 200 g (7/8 cup) unsalted butter
- 200 g (1 cup) brown sugar
- 150 g (1 1/4 cup) gluten-free self-raising flour
- 4 eggs (at room temperature)
- A pinch of salt
- 30 x 20 cm (8×12 inch) baking tin
Instructions
- Pre-heat the oven to 180 degrees Celsius (350F). Cover the baking tin with baking parchment and grease the sides with some butter.
- Put the chocolate together with the butter in a pan and melt on low heat.
- Whisk the eggs with the sugar until creamy. Add the melted chocolate and butter while stirring.
- Carefully fold the self-raising flour and salt into the mixture using a spatula.
- Pour 2/3 of the brownie batter into the baking tin and flatten the top. Put the other 1/3 of the batter in the fridge for the next serving of brownies*
- Bake the brownies in the middle of the oven for 30-35 minutes. Leave to cool down completely and put them into the fridge until serving.
Notes
*Do you want to make these brownies just to eat them at home? Then put all the batter in the baking tin and bake this for 30-35 minutes in the oven. You will get thicker brownies then. I made these brownies thinner, so they would fit into the mailbox.
- Prep Time: 15 min
- Cook Time: 20 min
- Category: Baking
- Method: Oven
- Cuisine: American
Together we go for a calm belly!
Subscribe to the Karlijn's Kitchen e-mail newsletter for more tips and recipes and receive the ebook 10 things I wish I had known when I started the FODMAP diet for free!

